1.4 Creating a Dataspace
You can follow these steps to create a new dataspace testbed on the platform.
-
Navigate to the Dataspaces function of the platform using the navigation menu on the left. Next, select the Create Dataspace button.

-
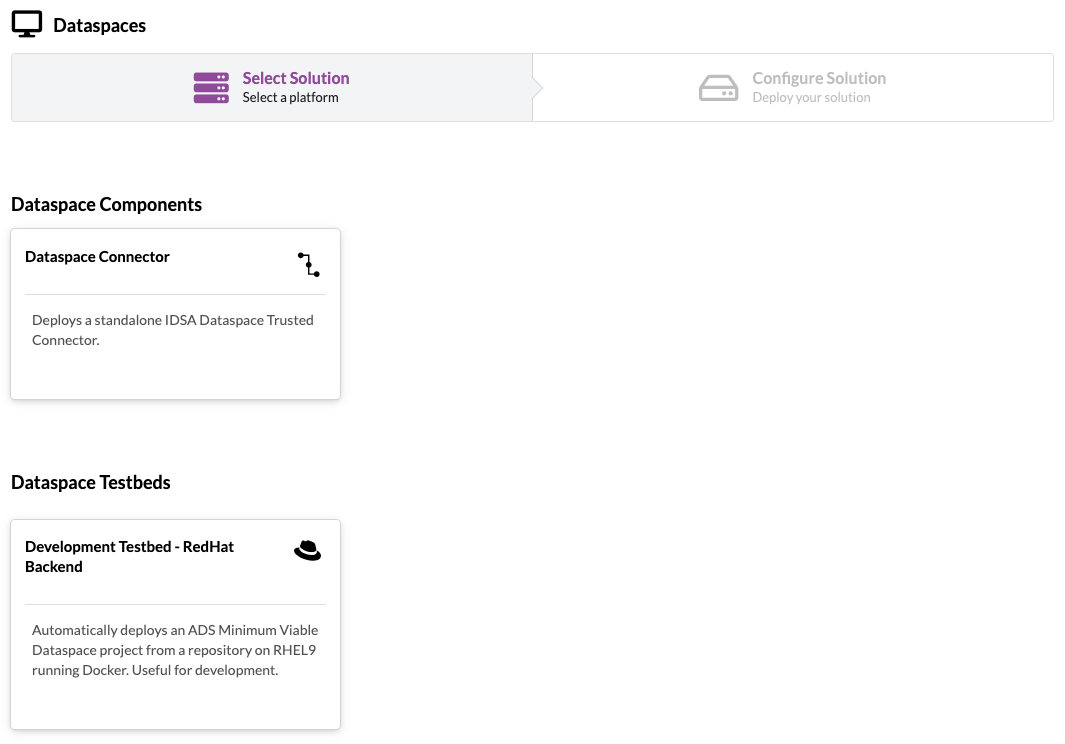
You will be presented with a list of available dataspace testbeds and components. Selecting a dataspace will determine the operating system and software packages available in your new dataspace. Select the dataspace type you require or contact the team if you require help selecting an appropriate dataspace type.
-
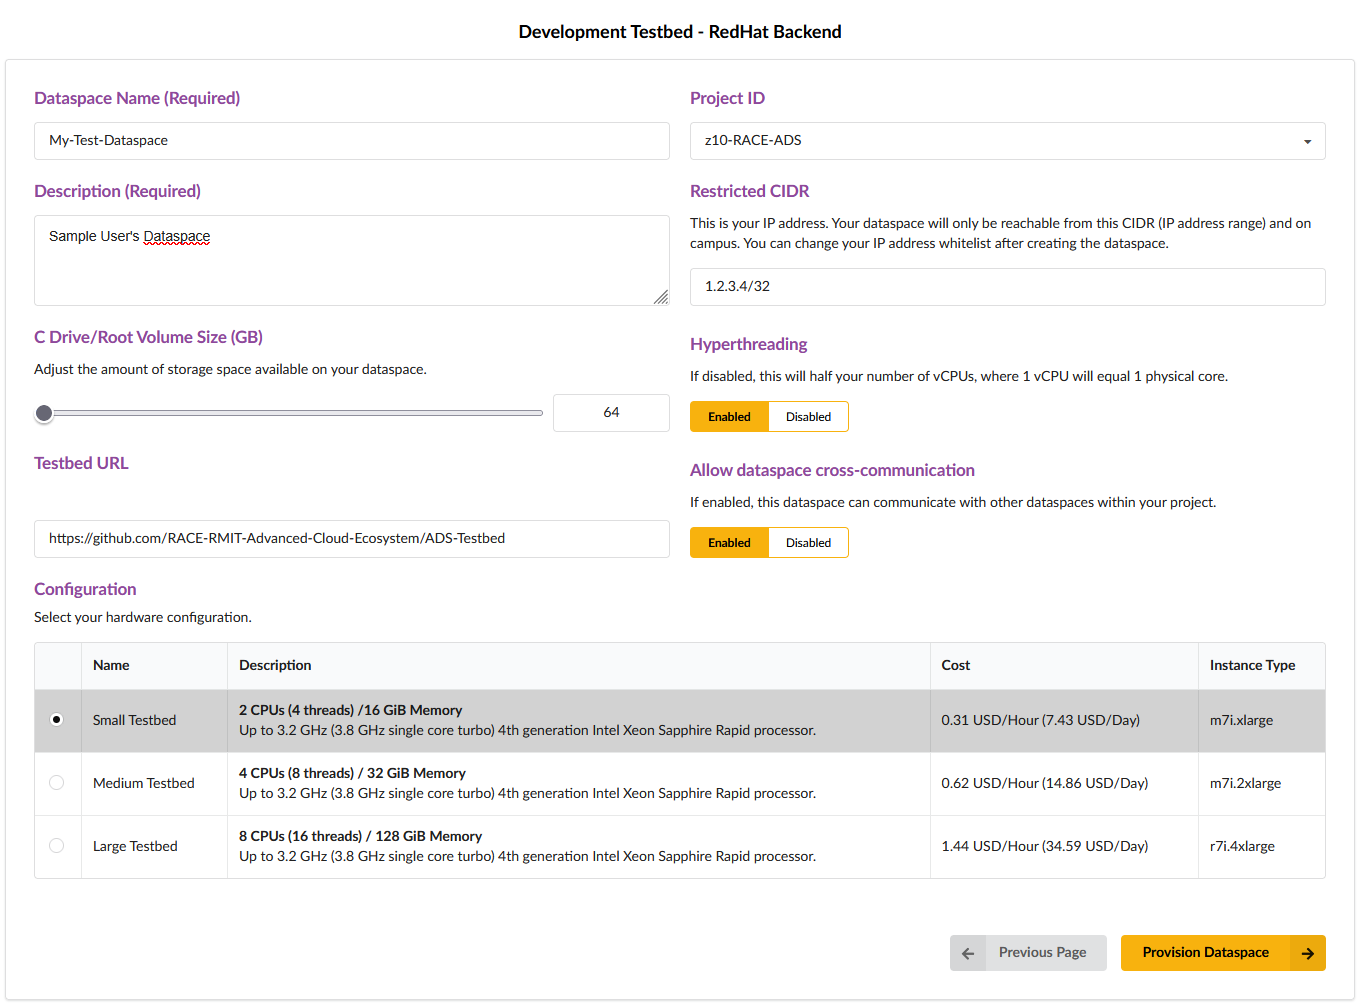
On the next screen, you will be presented with a series of options. Each option is explained below. Once you are happy with your choices, select ‘Provision Dataspace’ at the bottom of the page to create your dataspace. Apart from the dataspace name, all other options are prefilled and are suitable for provisioning a blank testbed environment.
Property Description Dataspace Name Enter a name to identify this dataspace. For example, “Workspace for Penguin and Fish ML Calculation A105”. Project ID This drop down can be used to select which project you wish to charge the dataspace to. Usually, you will only have access to a single project. If you have multiple projects funded, ensure you select the correct project. Description Enter any description. You can use this to record data details, or remind yourself of why you created the dataspace. Restricted CIDR A CIDR is format used to represent a range of IP addresses. By default, this will autofill with your current IP address. If you change location, you can later update this value to allow connections from new networks. To determine your CIDR at any time, you can perform a web search for “What is my IP address”. Once you have your public IP address, add ‘/32’ to the end to form the CIDR representing your IP address. For example, ‘1.2.3.4/32’. Smaller numbers after the ‘/’ will represent larger ranges. C Drive/Root Volume Size (GB) Change this to request a larger or smaller SSD size for your dataspace. Ensure you have enough room for the OS, and any additional datasets you may wish to host or receive. Enable Hyperthreading If you know your software does not perform well with hyperthreading, you may toggle this off. Otherwise, it is recommended to leave this active for best performance. For testbed environments, it is recommended to leave this enabled. Testbed URL If you have your own dataspace configuration hosted in the form of a Docker project within a git repository, you can update the URL to automatically load your own environment. Note: This option will only appear if launching a full testbed. Individual component sources are currently locked to the ADS repository. Allow dataspace cross-communication Once enabled, the dataspace can communicate with other dataspaces within your project. Please note, if your project doesn’t allow this, you will not able to enable it. Configuration This section contains a range of hardware configurations for your machine. Select a dataspace based on your expected workload. You will need to consider the number of CPU threads, available memory (RAM), type of workload, and if a GPU is required. (Note: only 3 options are currently provided for the prototype platform)
Below is the dataspace configuration screen:
Warning
Using a custom repository can cause your environment to fail on launch if the project is not configured in the expected format. Please see the bootstrap procedure for details on the expected configuration format.
-
You will be taken back to the main Dataspaces page, and your new dataspace should appear in the “Provisioning” state. It will take approximately 10 minutes to provision a new dataspace with all underlying cloud infrastructure. Once complete, your dataspace should enter the “Running” state.
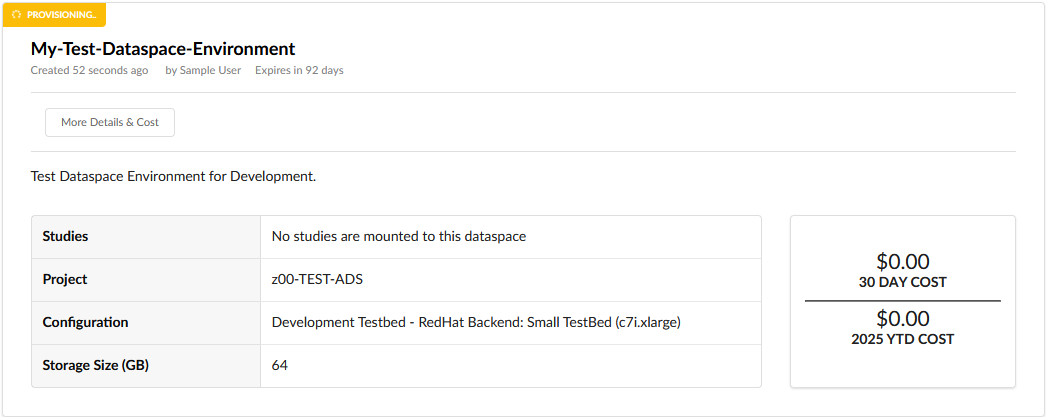


Your dataspace is now ready to use.
Tip
Remember to stop your Dataspace environment when not in use to save cost. If you no longer require the environment, please terminate the dataspace using the red ‘Terminate’ button.