5.4 Microsoft Azure
This section explains how to launch an ADS-based dataspace on Microsoft Azure. Azure support enables true multi-cloud deployment flexibility, allowing organisations to deploy dataspaces within their existing Azure infrastructure and governance frameworks. This reduces vendor lock-in, supports hybrid cloud strategies, and ensures organisations can leverage their established Azure investments, compliance policies, and regional data residency requirements.
Login to Microsoft Azure Portal
-
Access the Azure Portal at: https://portal.azure.com/
-
Sign in with your organisational credentials.
-
Once logged in, you’ll be directed to the Azure Portal dashboard.
Launch Virtual Machine In Microsoft Azure
-
In the Azure Portal, search for “Virtual machines” in the top search bar or select it from the left navigation menu.
-
Click the
+ Createbutton and selectAzure virtual machine.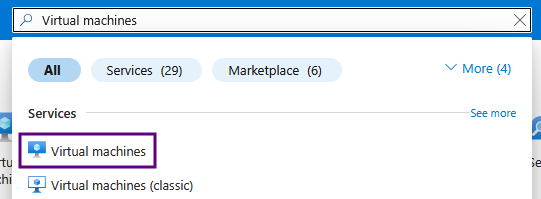
-
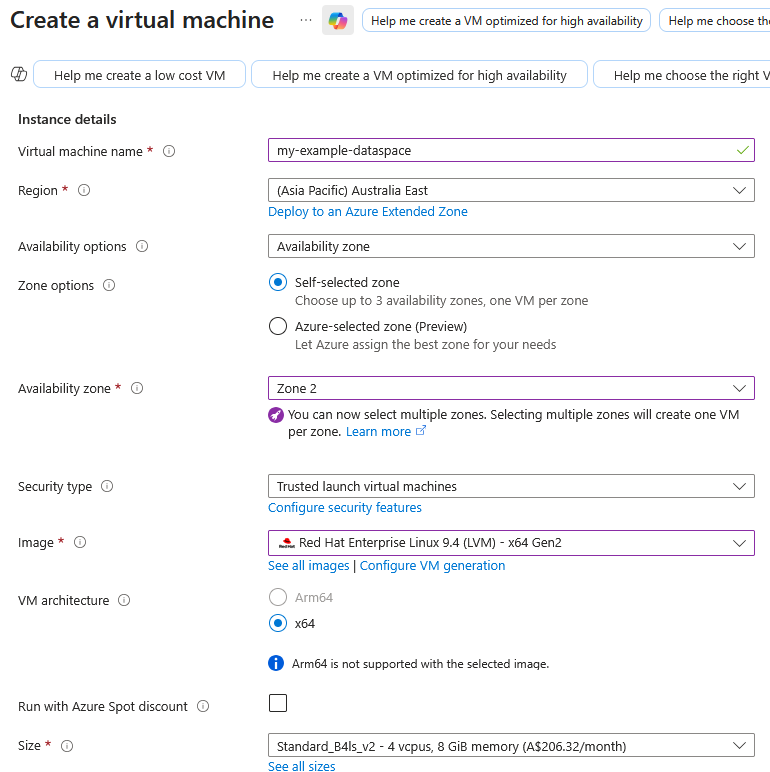
On the Basics tab, configure the following:
- Subscription: Select your Azure subscription
- Resource group: Select your Azure resource group, or create new
- Virtual machine name: Enter a name for your instance
- Region: Choose a region close to your location
- Image: Select
Red Hat Enterprise Linux 9.4 (LVM) - x64 Gen2 - Size: Select a size with at least 8GB RAM (e.g.,
Standard_D4s_v3orStandard B4ls v2)
-
Configure Administrator account:
- Authentication type: Select
SSH public key - Username: Enter
ec2-user(Note: Required for bootstrap. If you change the user, ensure you update the bootstrap script) - SSH public key source: Choose
Generate new key pairor use existing - Key pair name: Enter a name for your SSH key
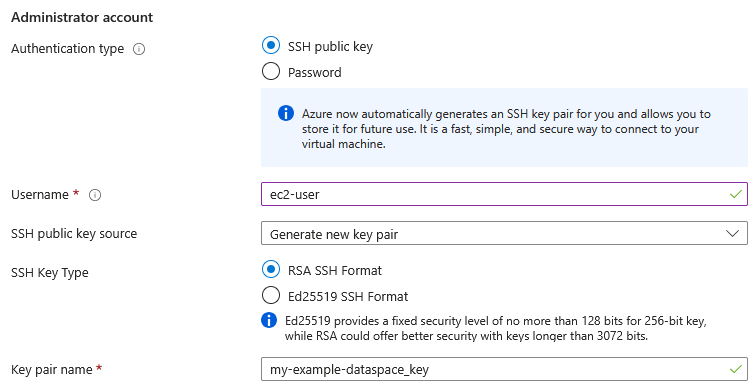
- Authentication type: Select
-
Configure Inbound port rules:
- Public inbound ports: Select
Allow selected ports - Select inbound ports: Choose
HTTPS (443)
Note
Additional ports can be configured later in the Network Security Group if required. You will need to add port 22 (SSH) for the CIDR range you wish to connect to the instance with. You can also add port 22 above, but note that this will allow any user globally to reach the SSH port of your machine.
- Public inbound ports: Select
-
Click
Next: Disks >and configure storage:- OS disk type: Select
Premium SSDorStandard SSDbased on your needs - OS disk size: You can use the default, or choose an amount based on the datasets you will be working with
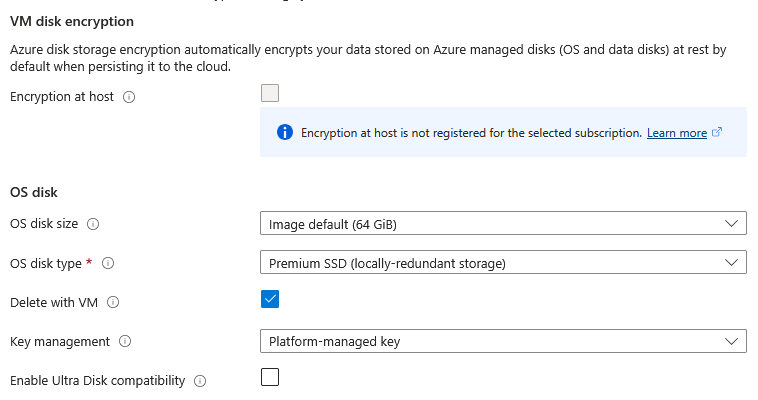
- OS disk type: Select
-
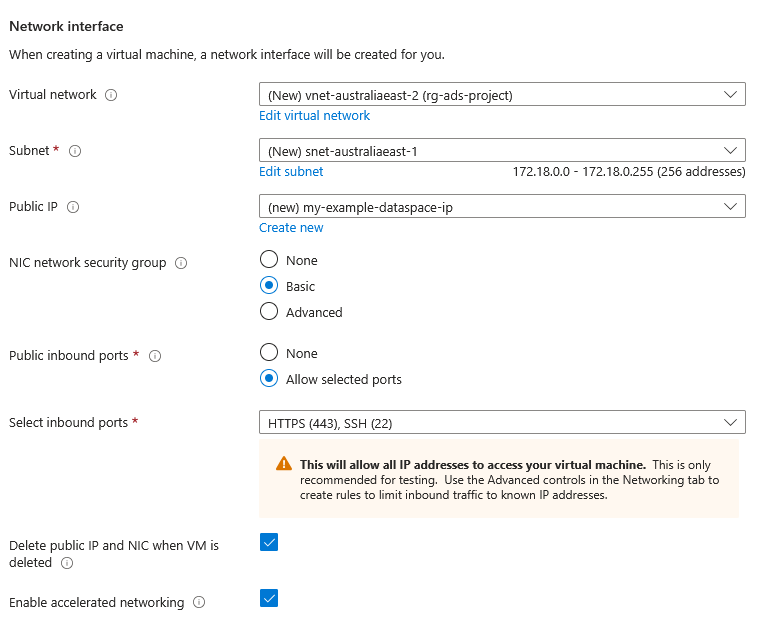
Click
Next: Networking >and review network settings:- A virtual network and subnet will be created automatically
- Ensure
Public IPis enabled - Note the Network Security Group name for later configuration
-
Click
Next: Management >, thenNext: Monitoring >, andNext: Advanced >. -
On the Advanced tab, expand the
Custom data and cloud initsection. -
In the Custom data field, paste the bootstrap script from below:
Click here to see the full bootstrap script
#!/bin/bash

export TZ="Australia/Melbourne"

echo "================================================"
echo
echo " Image building started at: $(date '+%Y-%m-%d %H:%M:%S')"
echo
echo "================================================"

CLOUDFRONT_URL="https://d3rilomah9t6qy.cloudfront.net"
TEMP_DIR="/tmp/RACE"
POSTMAN_CLI_INSTALLER_KEY="install-postman-cli.sh"
MOTD_SH_KEY="mymotd-ads.sh"
DASHBOARD_OPERATOR_PY_KEY="dashboard-operator.py"
DASHBOARD_OPERATOR_REQ_KEY="requirements.txt"
IDS_TESTBED_REPO="https://github.com/RACE-RMIT-Advanced-Cloud-Ecosystem/ADS-Testbed"
USER_HOME="/home/ec2-user"
TESTBED_DIR="$USER_HOME/IDS-testbed"
NODE_VERSION=22

# configure motd
sudo curl -o /etc/profile.d/mymotd.sh $CLOUDFRONT_URL/$MOTD_SH_KEY

# update repos and install epel
sudo dnf update && sudo dnf upgrade -y
sudo dnf install -y epel-release || sudo dnf config-manager --set-enabled crb && sudo dnf install -y epel-release
# install packages use dnf
sudo dnf install -y yum-utils git firewalld nano wget golang sqlite-devel gcc java-11-openjdk-headless
# make temporary dir
mkdir -p $TEMP_DIR

# open firewall ports
sudo systemctl enable firewalld
sudo systemctl start firewalld
sudo firewall-cmd --permanent --add-port=80/tcp
sudo firewall-cmd --permanent --add-port=443/tcp
sudo firewall-cmd --permanent --add-port=8080/tcp
sudo firewall-cmd --permanent --add-port=8081/tcp
sudo firewall-cmd --reload

# install docker
sudo yum-config-manager --add-repo https://download.docker.com/linux/rhel/docker-ce.repo
sudo dnf install -y docker-ce docker-ce-cli containerd.io docker-buildx-plugin docker-compose-plugin
sudo systemctl start docker
sudo systemctl enable docker

# install postman cli
wget -O $TEMP_DIR/$POSTMAN_CLI_INSTALLER_KEY $CLOUDFRONT_URL/$POSTMAN_CLI_INSTALLER_KEY
sh $TEMP_DIR/$POSTMAN_CLI_INSTALLER_KEY

# clean up temp folder
rm -rf $TEMP_DIR

# install cfssl
sudo su << CFSSL_EOF
export HOME=/root
export GOPATH=/go
export GOMODCACHE=/go/pkg/mod
mkdir -p $GOPATH/bin $GOMODCACHE
mkdir -p /tmp/cfssl-install && cd /tmp/cfssl-install
go mod init cfssl-install
go install github.com/cloudflare/cfssl/cmd/cfssl@latest
go install github.com/cloudflare/cfssl/cmd/cfssljson@latest
go get github.com/mattn/go-sqlite3
mv /go/bin/cfssl /usr/local/bin/
mv /go/bin/cfssljson /usr/local/bin/
CFSSL_EOF

# clone the main repo
git clone "$IDS_TESTBED_REPO" "$TESTBED_DIR"

# Install Node Version Manager
curl -o- https://raw.githubusercontent.com/nvm-sh/nvm/v0.40.3/install.sh | bash
\. "$HOME/.nvm/nvm.sh"
nvm install $NODE_VERSION
[ -n "$(which npm)" ] && echo "export PATH=\"\$PATH:$(dirname "$(which npm)")\"" >> $USER_HOME/.bashrc
## Install newman and newman-reporter-html
npm install -g newman newman-reporter-html

# add /usr/local/bin to user's PATH
echo 'export PATH="$PATH:/usr/local/bin"' >> $USER_HOME/.bashrc
## Correct user folder permissions ##
sudo chown -R ec2-user:ec2-user $TESTBED_DIR $USER_HOME/.bashrc


# add python script to support dashboard operations
sudo su << DASHBOARD_OPERATOR_EOF
mkdir -p /opt/dashboard-operator

curl -o /opt/dashboard-operator/$DASHBOARD_OPERATOR_PY_KEY $CLOUDFRONT_URL/$DASHBOARD_OPERATOR_PY_KEY
curl -o /opt/dashboard-operator/$DASHBOARD_OPERATOR_REQ_KEY $CLOUDFRONT_URL/$DASHBOARD_OPERATOR_REQ_KEY

python3 -m venv /opt/dashboard-operator/venv
source /opt/dashboard-operator/venv/bin/activate
pip install -r /opt/dashboard-operator/$DASHBOARD_OPERATOR_REQ_KEY

cat > /etc/systemd/system/dashboard-operator.service << EOF
[Unit]
Description=Dashboard Operator Service
After=network.target

[Service]
Type=simple
User=root
WorkingDirectory=/home/ec2-user/IDS-testbed
Environment=PATH=/usr/local/sbin:/usr/local/bin:/usr/sbin:/usr/bin:/var/lib/snapd/snap/bin
ExecStart=/opt/dashboard-operator/venv/bin/python /opt/dashboard-operator/$DASHBOARD_OPERATOR_PY_KEY
Restart=always
RestartSec=10

[Install]
WantedBy=multi-user.target
EOF

systemctl daemon-reload
systemctl enable dashboard-operator.service
systemctl start dashboard-operator.service
DASHBOARD_OPERATOR_EOF

# manually compose up docker
export COMPOSE_PARALLEL_LIMIT=1
cd $TESTBED_DIR && sudo docker compose up -d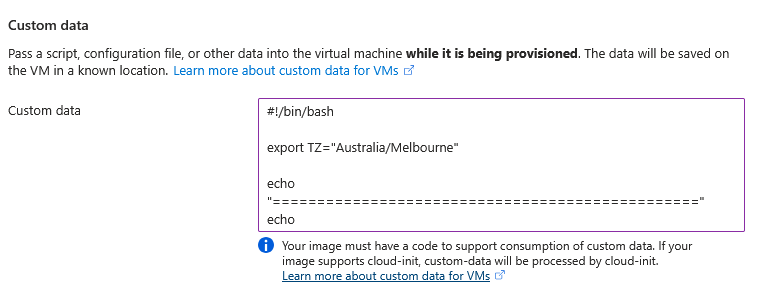
-
Click
Review + createto validate your configuration. -
Review all settings and click
Create. If you selected to generate a new SSH key pair, a dialog will appear to download the private key. Save this file securely.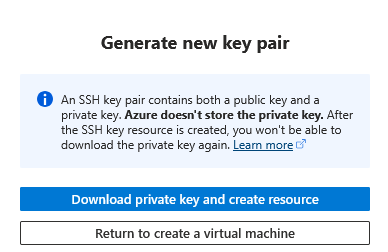
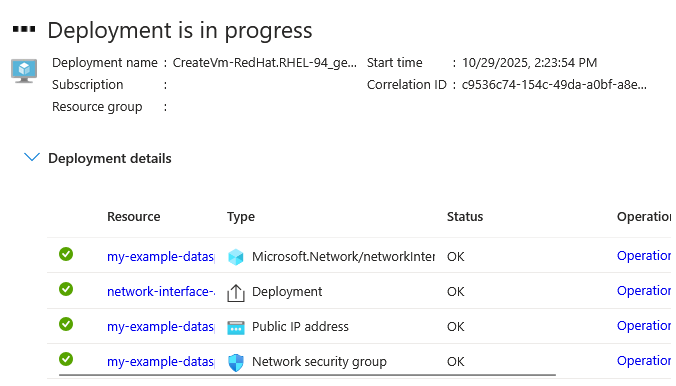
-
The deployment will begin. This process typically takes 5-10 minutes for the VM to be created, plus additional time for the custom data script to complete (up to 40 minutes depending on VM size).
Configure Network Security Group
After the VM is created, configure the Network Security Group to allow required ports:
-
Navigate to your Virtual Machine in the Azure Portal.
-
In the left menu, select
Networkingunder theSettingssection. -
Click on the Network Security Group name (it will be a blue hyperlink).
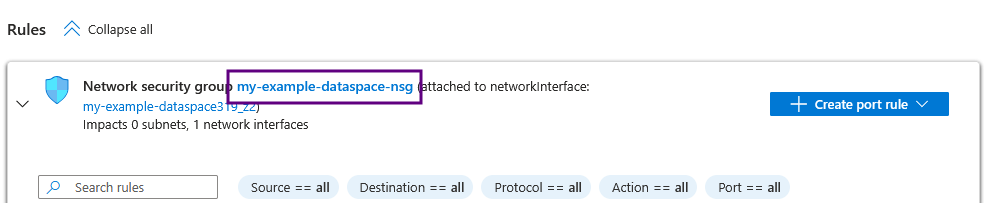
-
In the left menu, select
Inbound security rulesunderSettings. -
Click
+ Addto create a new rule for each required port: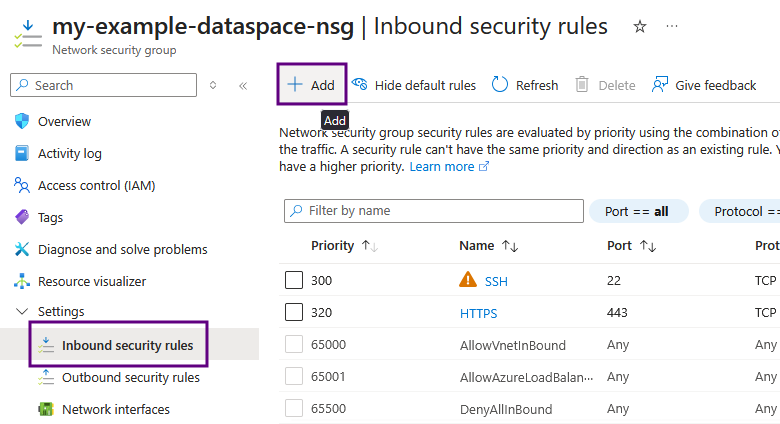
-
For each port, configure the following:
- Source: Select
My IP address(recommended) orAny(only recommended for port 443 [HTTPS]) - Source port ranges:
* - Destination:
Any - Service:
Custom(Or select a pre-defined service such asSSHorHTTPS) - Destination port ranges: Enter the specific port
- Protocol:
TCP - Action:
Allow - Priority: Use auto-assigned or specify (lower numbers = higher priority)
- Name: Give it a descriptive name
Security Note
For security, it’s recommended to restrict source IP to your specific IP address rather than allowing from
Any.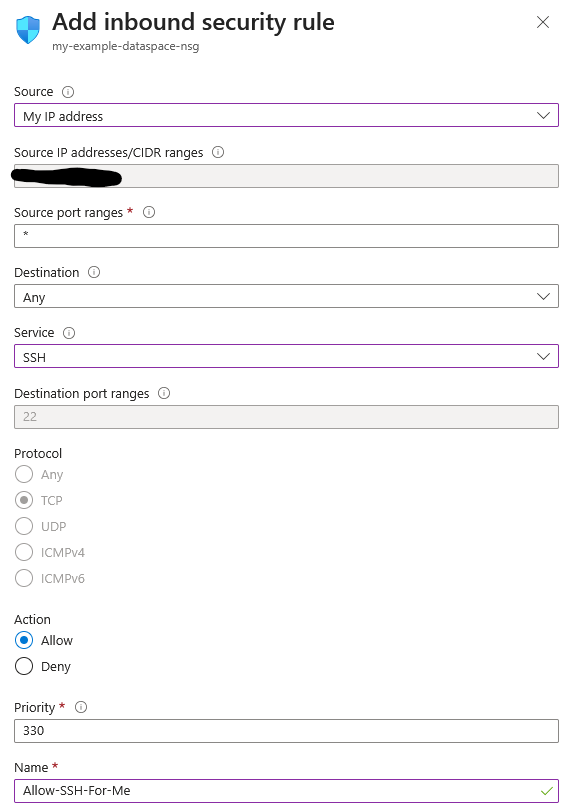
- Source: Select
Connect to Virtual Machine In Microsoft Azure
You have several options to connect to your Azure VM:
-
Via SSH (works immediately after deployment) Use the SSH private key you downloaded during VM creation to connect:
ssh -i path/to/your-key.pem ec2-user@<VM-PUBLIC-IP>Replace
<VM-PUBLIC-IP>with your VM’s public IP address (found on the VM overview page).Note
Ensure port
22is open in your Network Security Group.Information
On Linux/MacOS, you may need to set proper permissions on your key file:
chmod 400 path/to/your-key.pem -
Open the Dataspace Dashboard (works after dataspace initialisation has completed) Access the VM’s GUI through your web browser:
Navigate to
https://<VM-PUBLIC-IP>/dashboardNote
Ensure port
443is open in your Network Security Group. Your browser may show a security warning due to the self-signed certificate. You can safely proceed.Connection Failed?
Your dataspace takes time to install. If you cannot load the dashboard, try to SSH into your virtual machine, and check the welcome message. If you see
The dataspace is currently being configured., then your dataspace is being configured.
Verify Installation
To verify that the bootstrap script has completed successfully:
- Connect to your VM via SSH
- Check the cloud-init logs:
sudo tail -f /var/log/cloud-init-output.log - Look for the completion message indicating the installation finished
- Verify Docker containers are running:
sudo docker ps