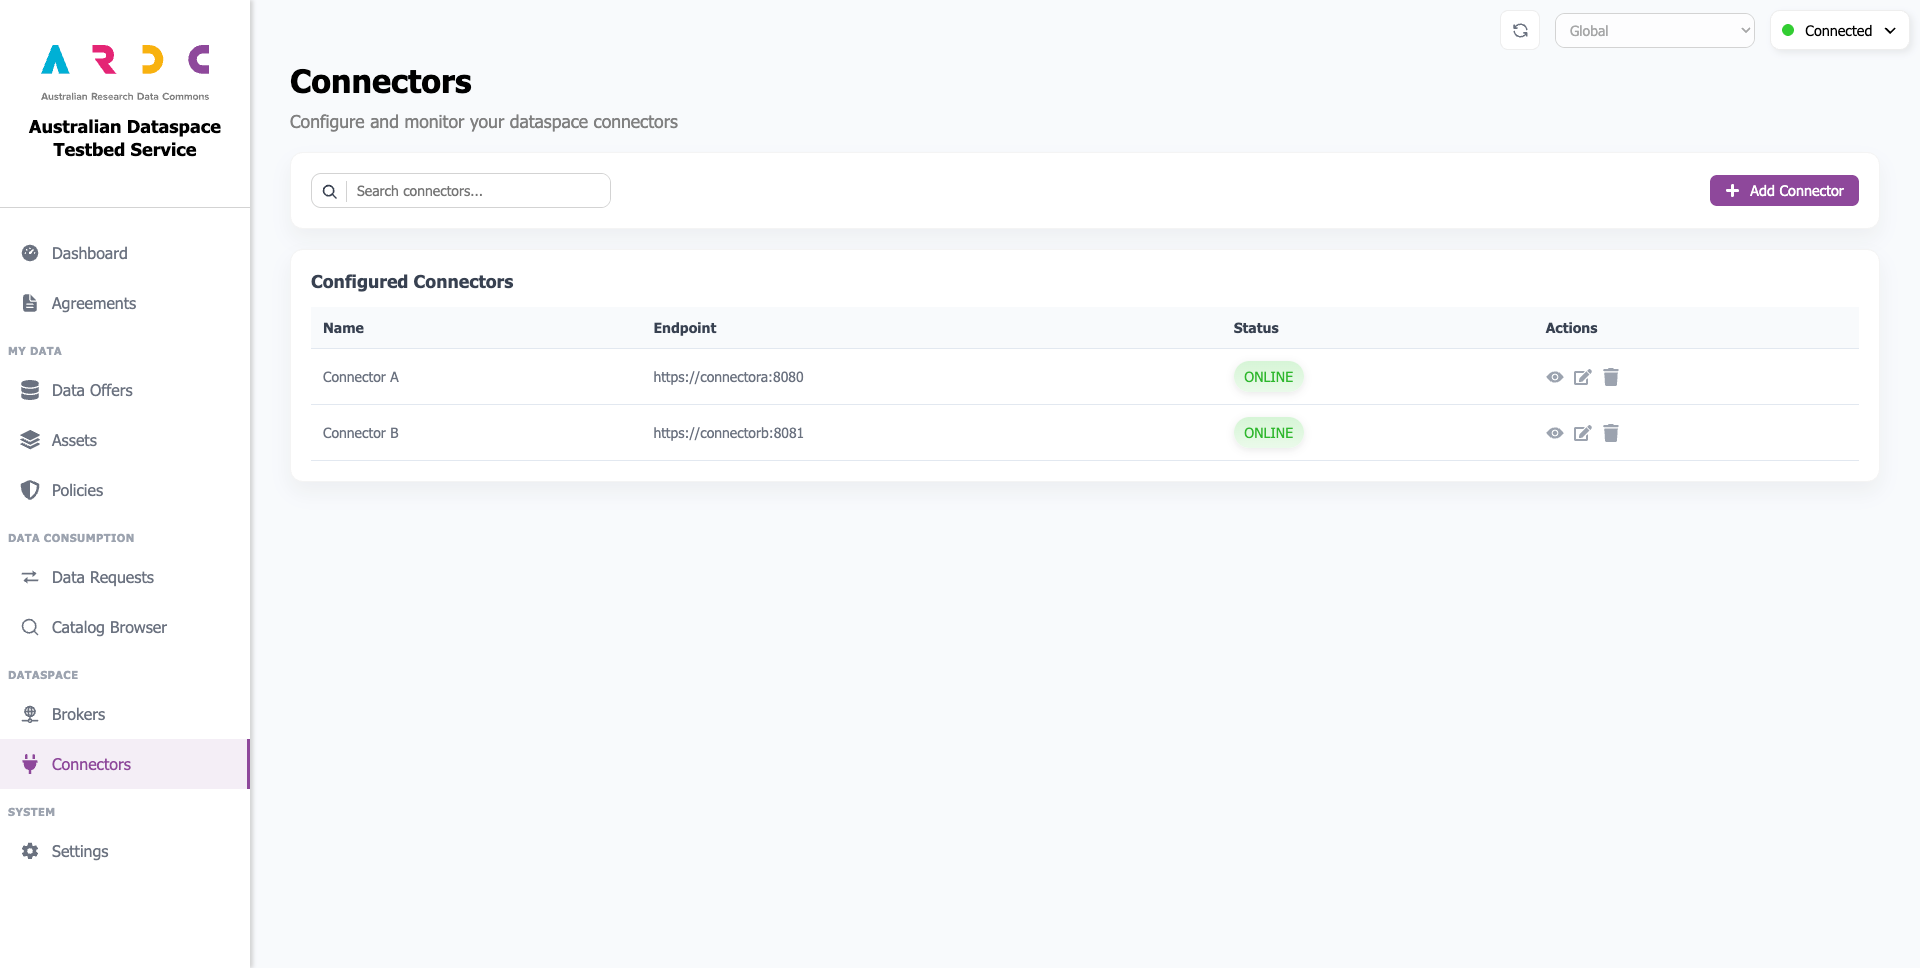
3.2.3 Connectors
The Connectors page allows you to create, view, and manage connectors using the dashboard. Connectors will appear here after completing the setup wizard.
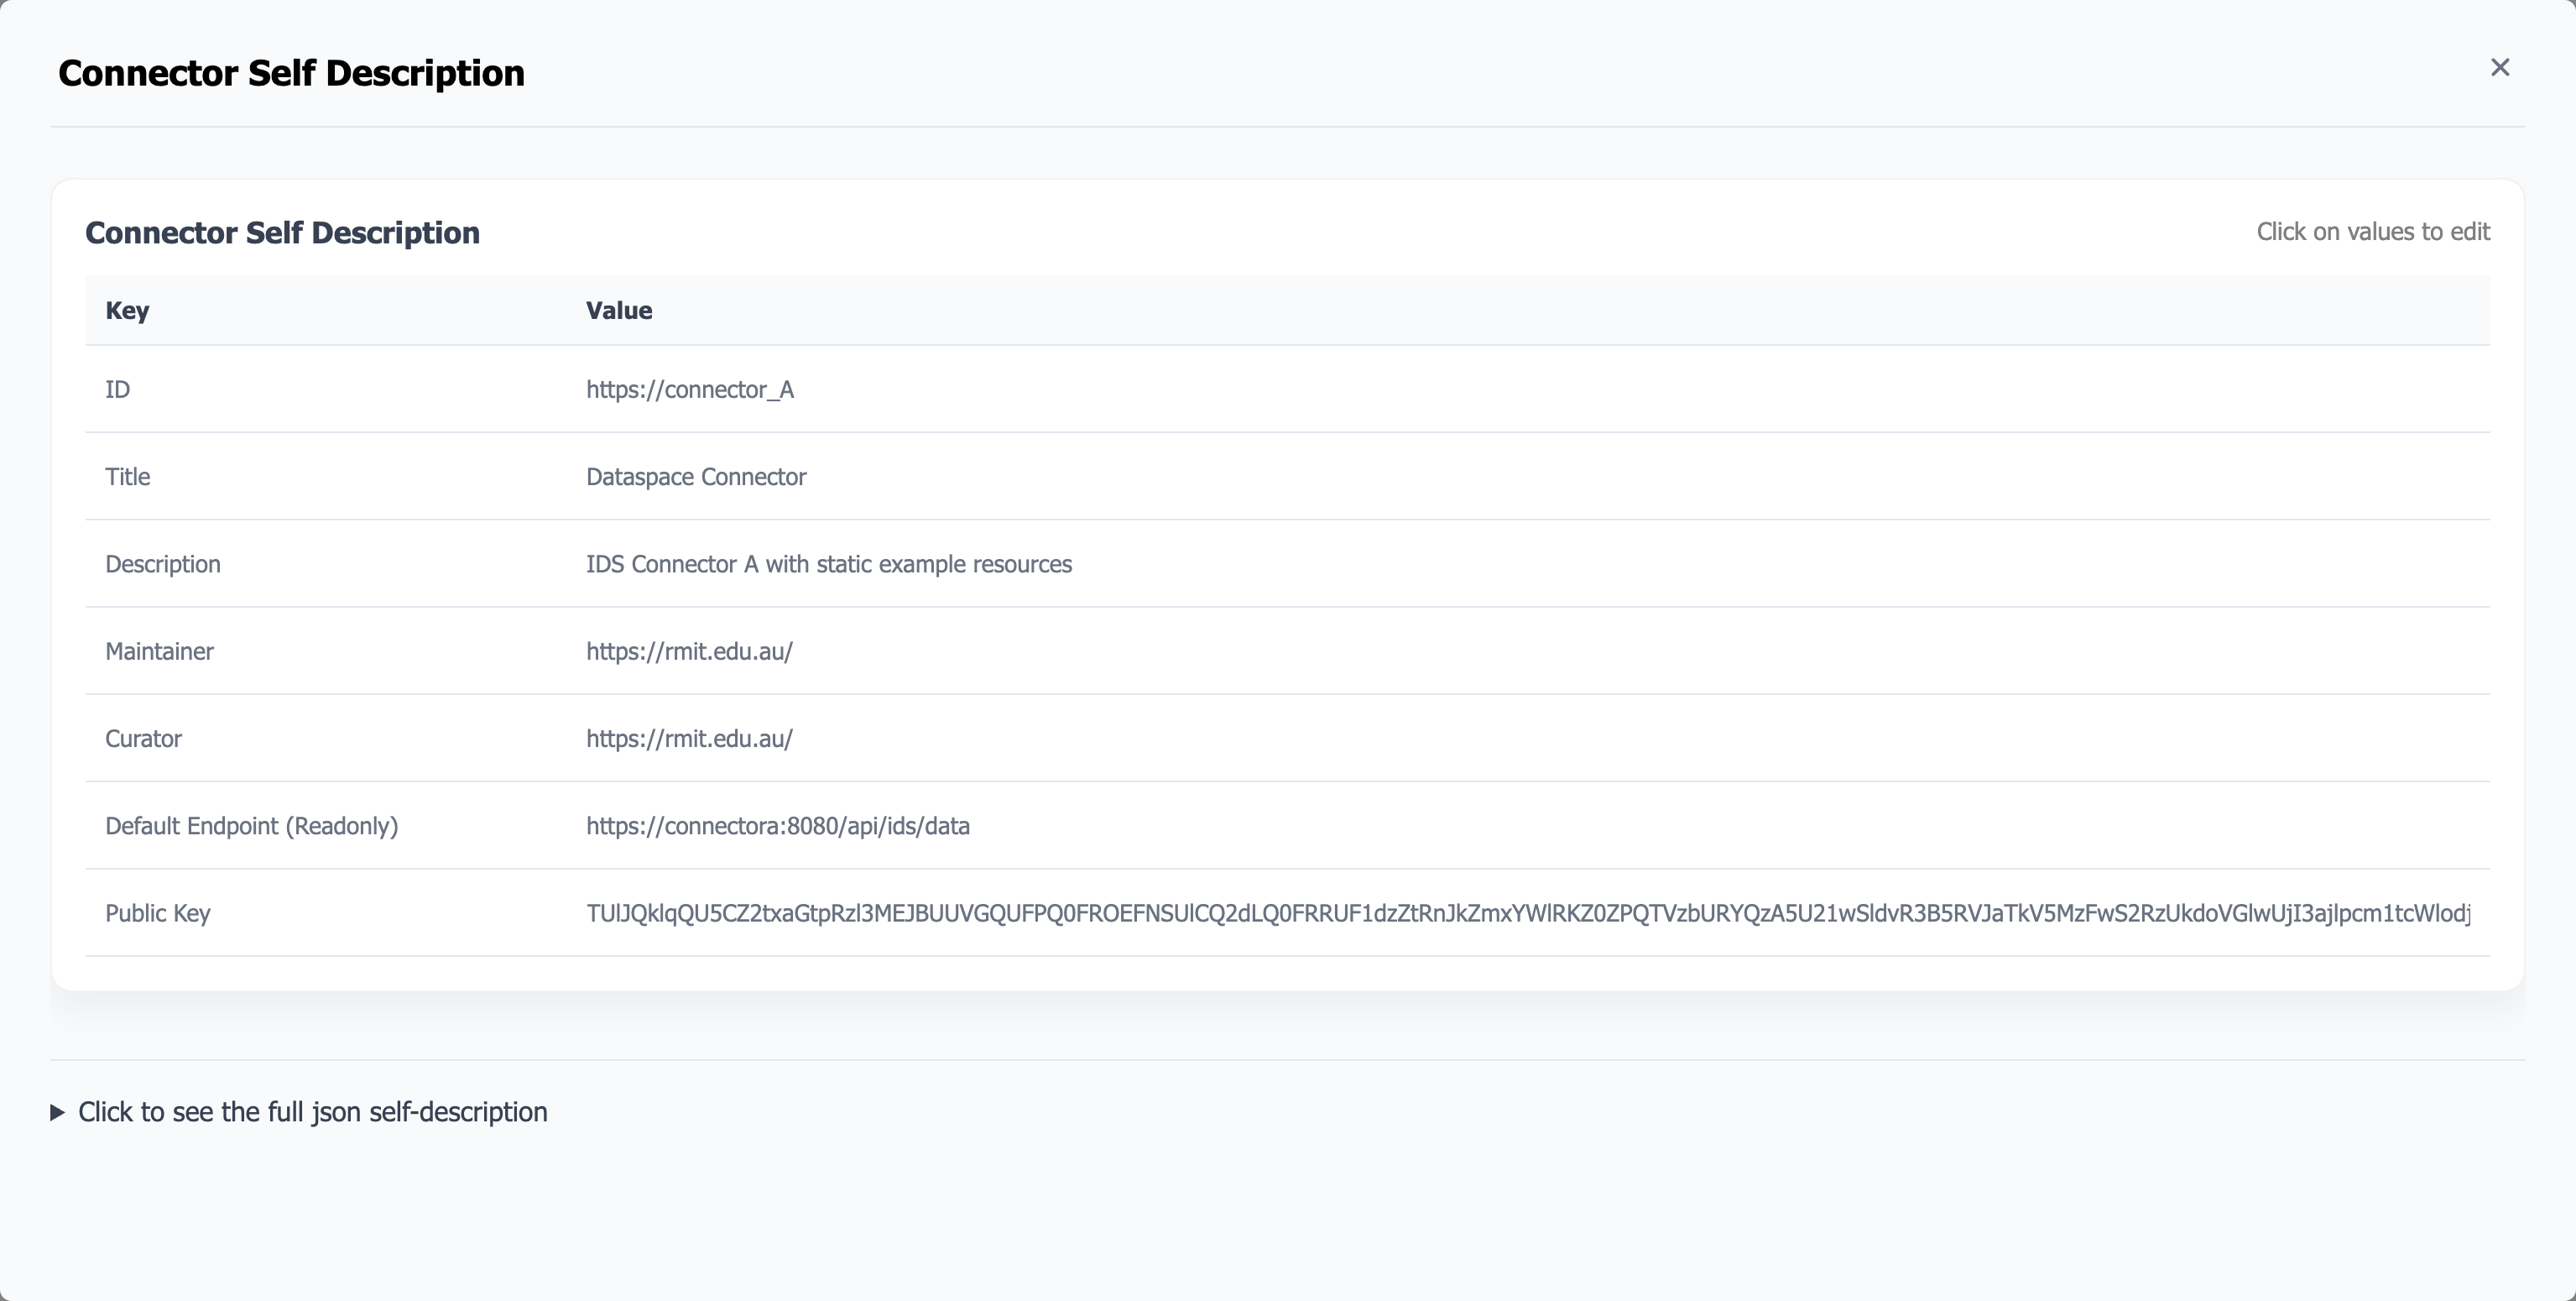
View Connector Details
To view connector details, click the view button in the Actions column. A popup window displays a table with basic connector information and an expandable section showing the connector’s self-description in JSON format.
Edit Connector Configuration
Warning
If you have resources registered with a metadata broker, deregister them before updating your connector’s configuration. After the update, previously registered resources will become inaccessible and cannot be deregistered. These resources will remain in metadata brokers, with all future requests failing.
To edit a connector’s configuration (self-description), open the view connector details page and click any non-readonly value to begin editing. Click the x button to cancel or the Check button (or press Enter) to finish editing.
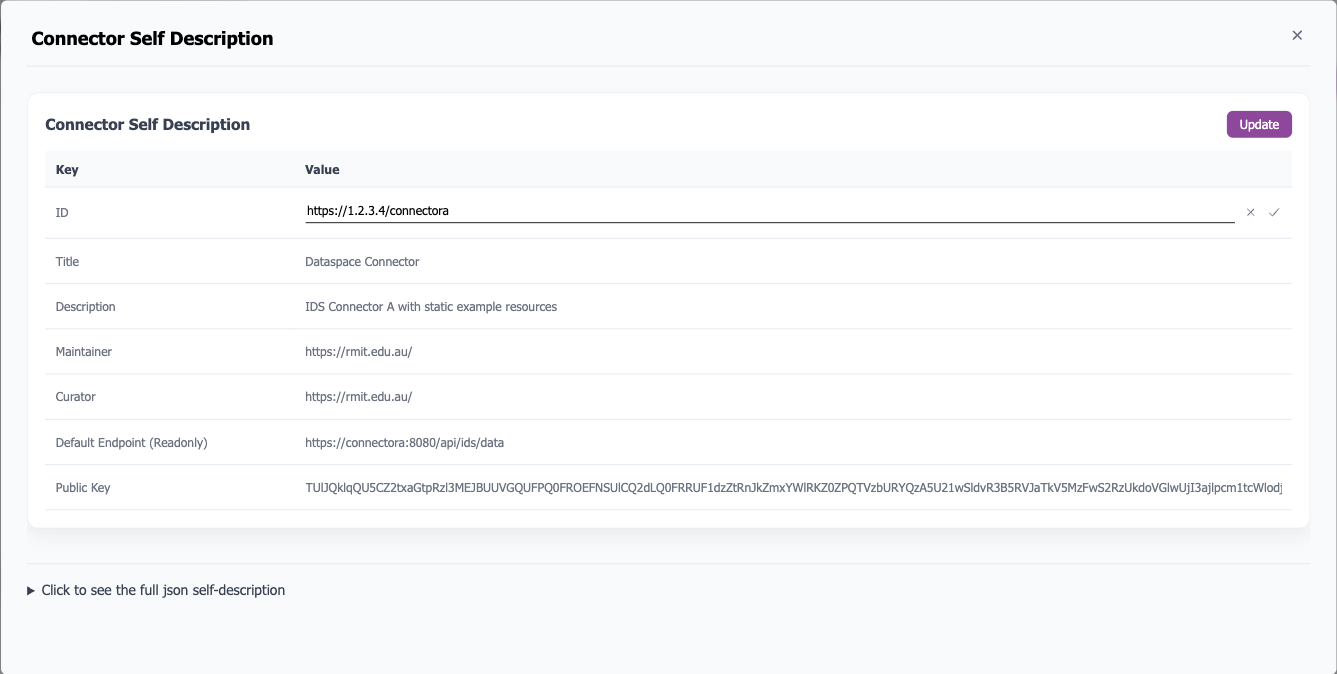
Once finished, click the Update button in the top-right corner of the table. A notification will display the update result.
Note
Remember to update your connector at the metadata broker after updating your connector’s configuration.
Edit Connector Information
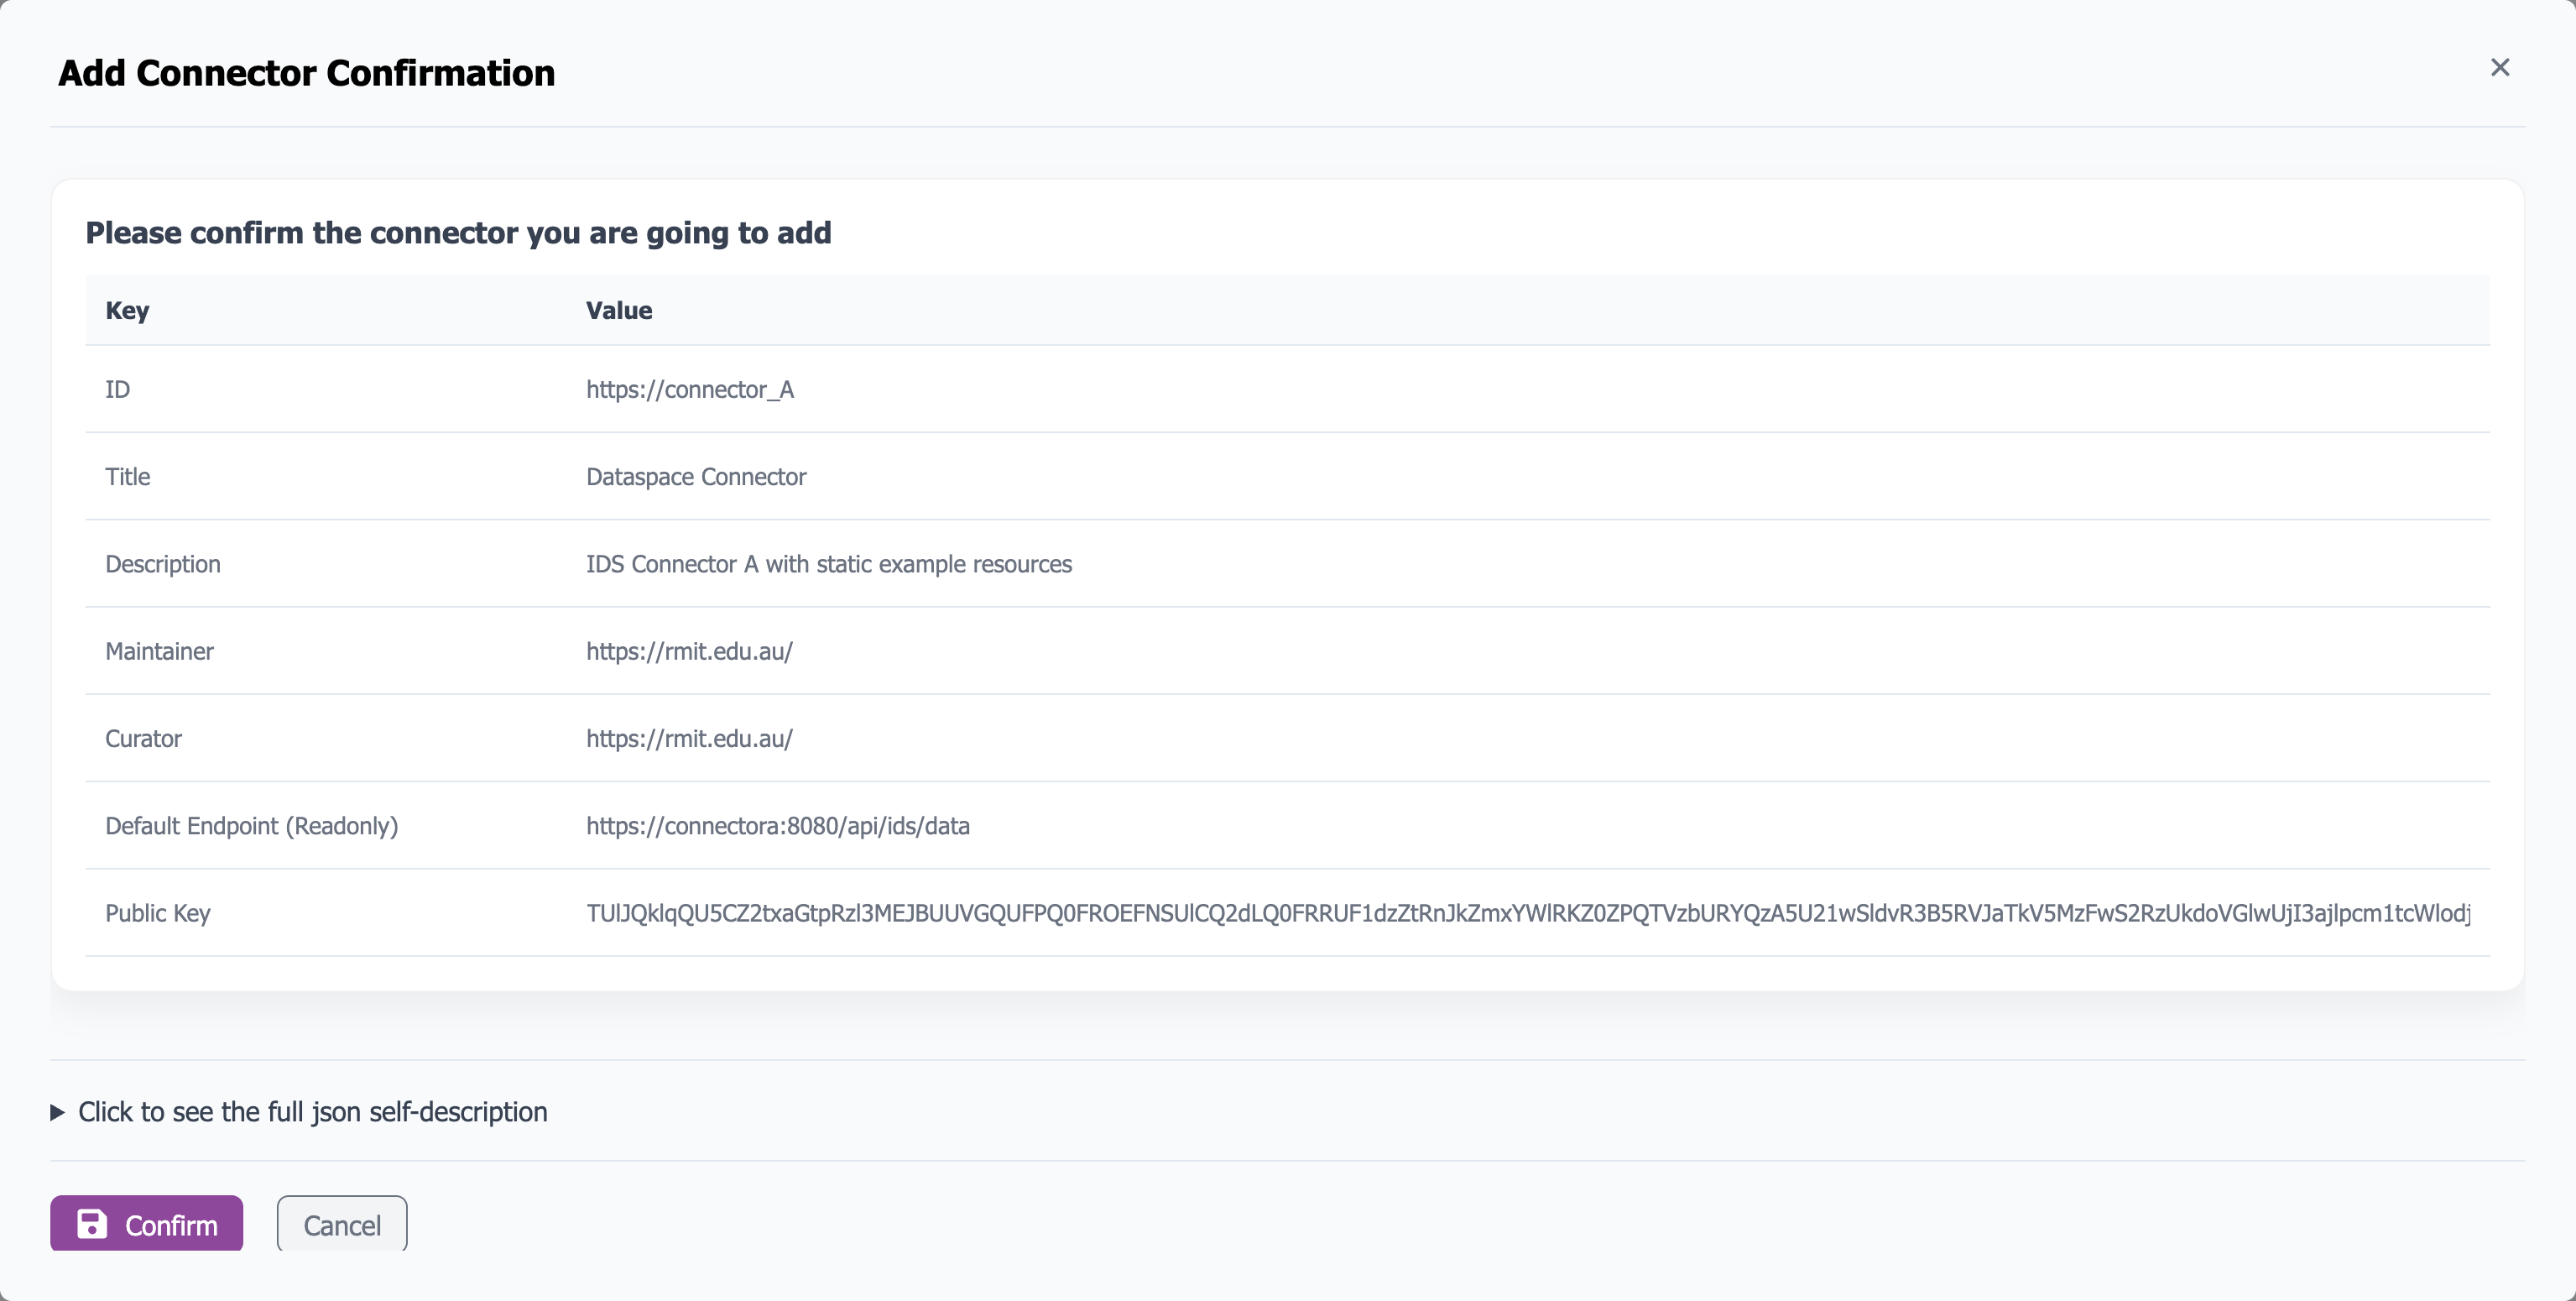
To edit the basic connection information for a connector, click the edit button in the Actions column. A popup window displays the current information. Make your changes and click the Submit button.

The dashboard will retrieve the connector’s self-description using the information you provided and display a confirmation window for review before updating.
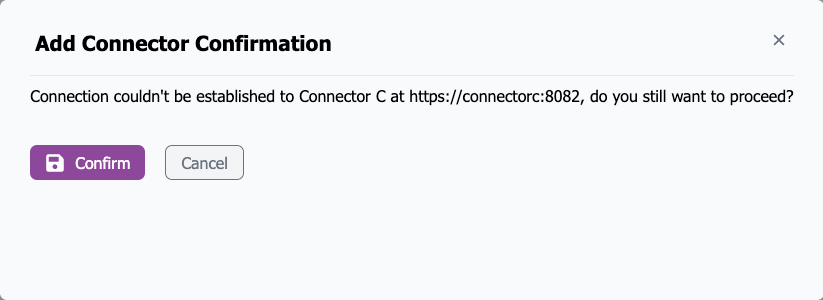
If the dashboard cannot retrieve the connector information, an error confirmation window will appear:
Add New Connector
Click the Add Connector button to create a new connector, following the same process as editing connector information.

Once created, the connector appears in the updated connector list and can be selected from the top navigation bar.